

So last summer I was running late for a brunch date, my hair was doing this weird half-greasy-half-frizzy thing (you know the day-two hair struggle), and I had exactly zero minutes to deal with it. I grabbed an old silk scarf my aunt gave me years ago, tied it around my head in a panic, and walked out the door expecting people to ask if I was having a bad hair day.
Instead, three different people complimented my “hairstyle.” Three.
That was the moment I realized silk bandanas aren’t just a backup plan they’re genuinely one of the easiest ways to look put-together with almost no effort. Since then, I’ve basically built a small collection of silk scarves (raiding thrift stores helps a lot, by the way), and I’ve tried more bandana hairstyles than I’d like to admit, including some that were total disasters.
If you’ve got long hair and you’re tired of the same low ponytail or messy bun every single day, this is for you.
Why Silk Specifically? (Not Just Any Scarf)
Before we get into styles, let’s talk material for a second because this actually matters.
I used to use random polyester scarves, and honestly? They slipped off my head constantly. Silk grips your hair slightly without snagging it, so it stays put longer, and it doesn’t cause that annoying friction that leads to frizz or breakage. Cotton bandanas are fine too, but they tend to leave creases in your hair if you wear them for hours.
If you don’t already own a silk scarf, you don’t need to spend a fortune. I’ve found great ones at:
- Thrift stores (seriously, look in the accessories bin)
- Target’s accessory section
- Etsy shops that sell silk scrap squares for cheap
A 21×21 inch square is the most versatile size for bandana styles. Anything smaller gets fiddly.
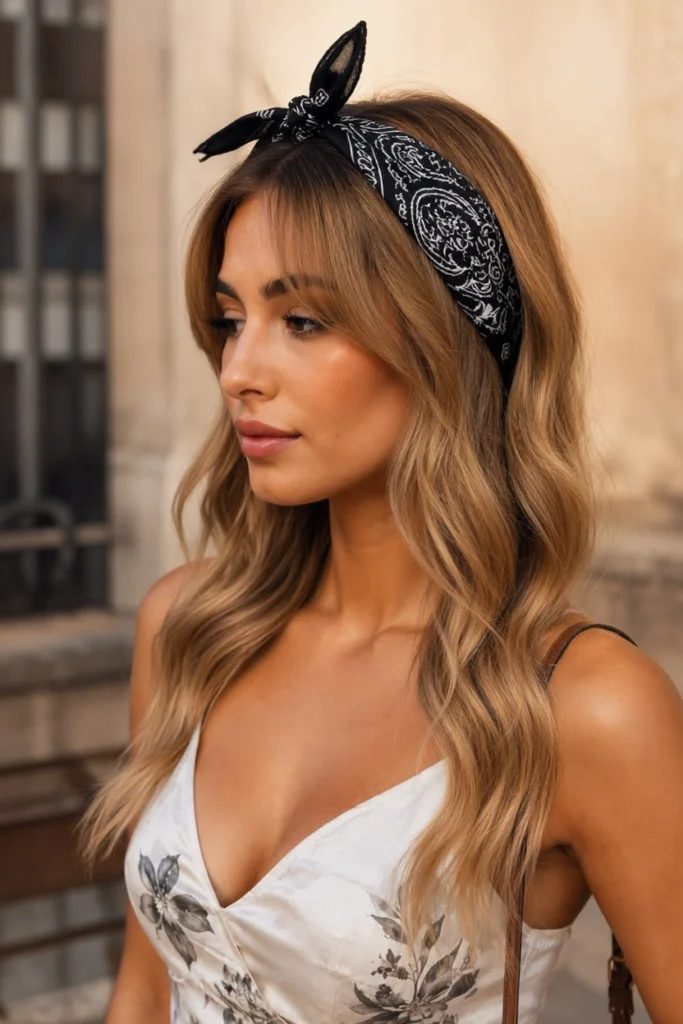
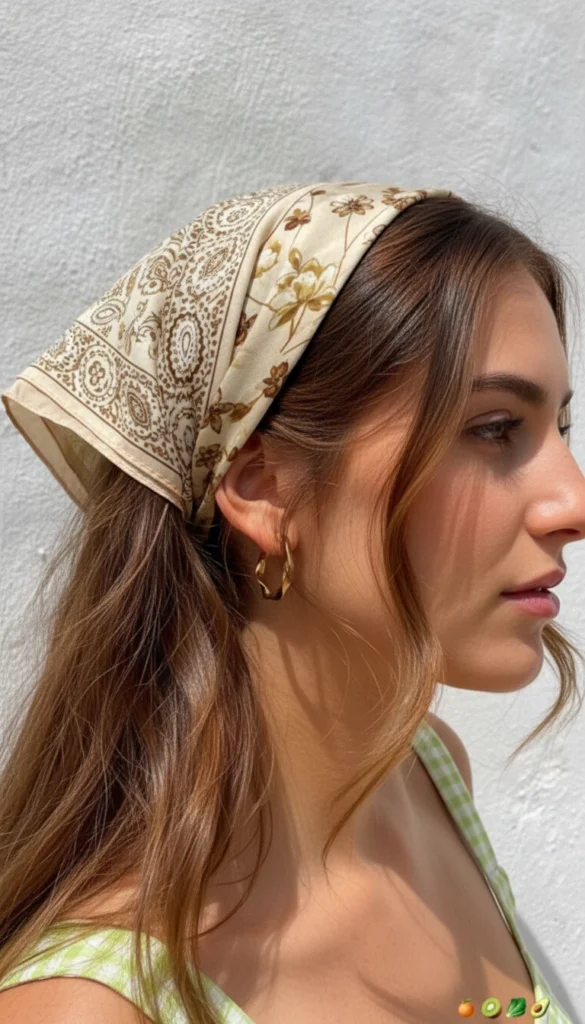
1. The Classic Headband Wrap

Fold your scarf into a triangle, then roll it from the long edge into a band. Place it behind your hairline, tie at the nape or top of your head. This is my go to for second day hair because it covers the roots without looking like you’re “hiding” anything.
Lesson learned: Don’t roll it too tight or it’ll give you a headache by hour three. I learned this during a six our road trip not fun.
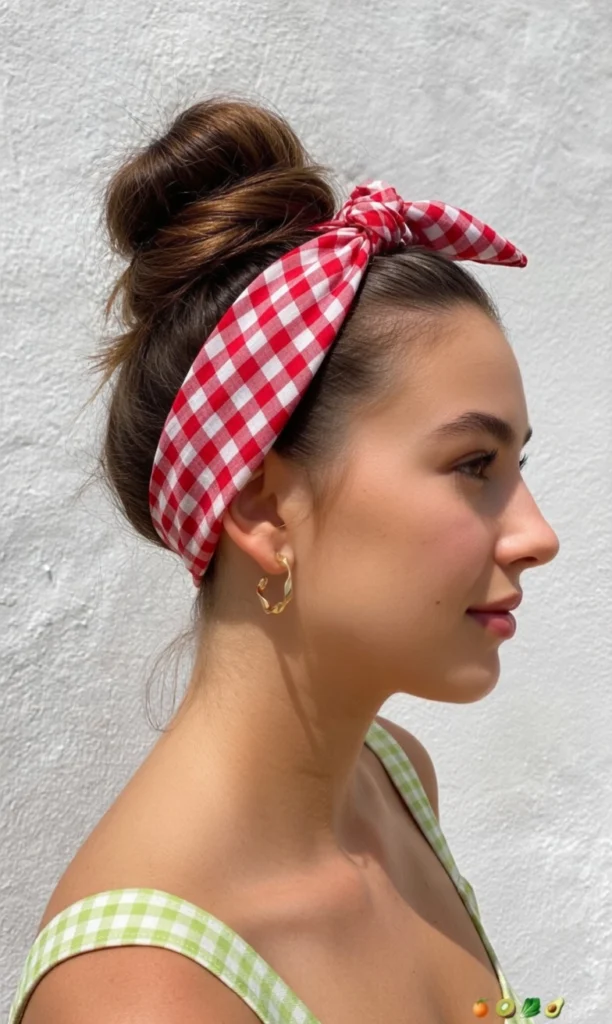
2. Half-Up Bandana Bun
Take the top half of your hair, twist it, and wrap your bandana around the twist before securing it into a bun. This adds texture and looks intentional even if your actual hair underneath is a mess.
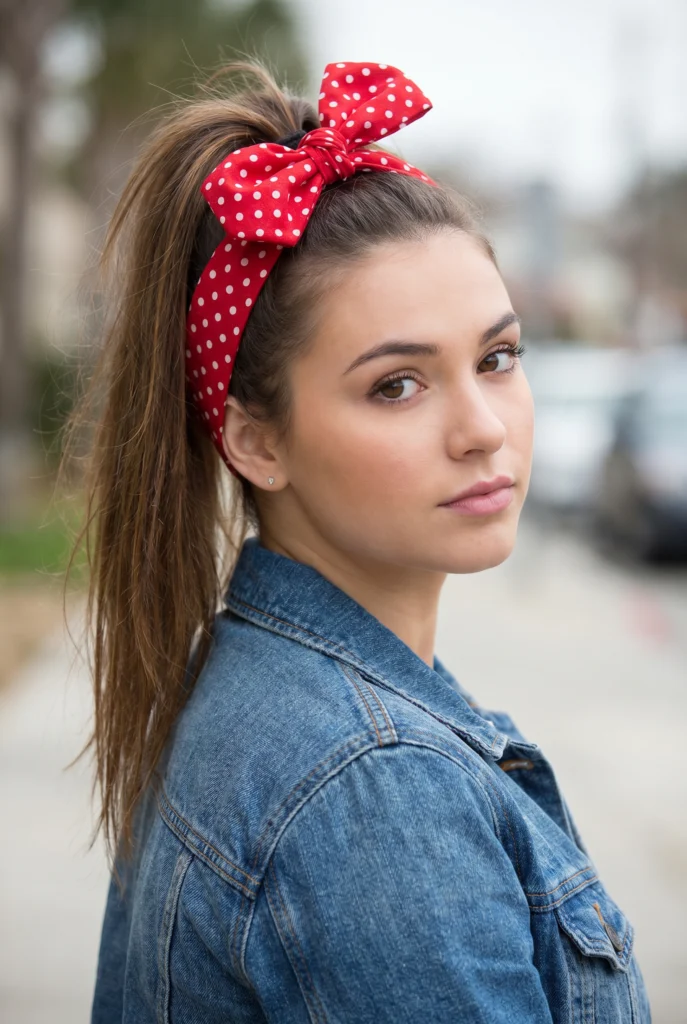
3. Front-Knot Bandana
Tie the scarf at the front of your forehead like a 70s rockstar. Sounds bold, but with long hair flowing down, it actually looks softer than you’d expect. I wore this to a concert and got asked where I got my scarf from three separate times.
4. Low Ponytail Wrap

Wrap the bandana around the base of a low ponytail and tie it in a bow. Simple, elegant, takes 30 seconds. Great for office days when you want “effortless but polished.”
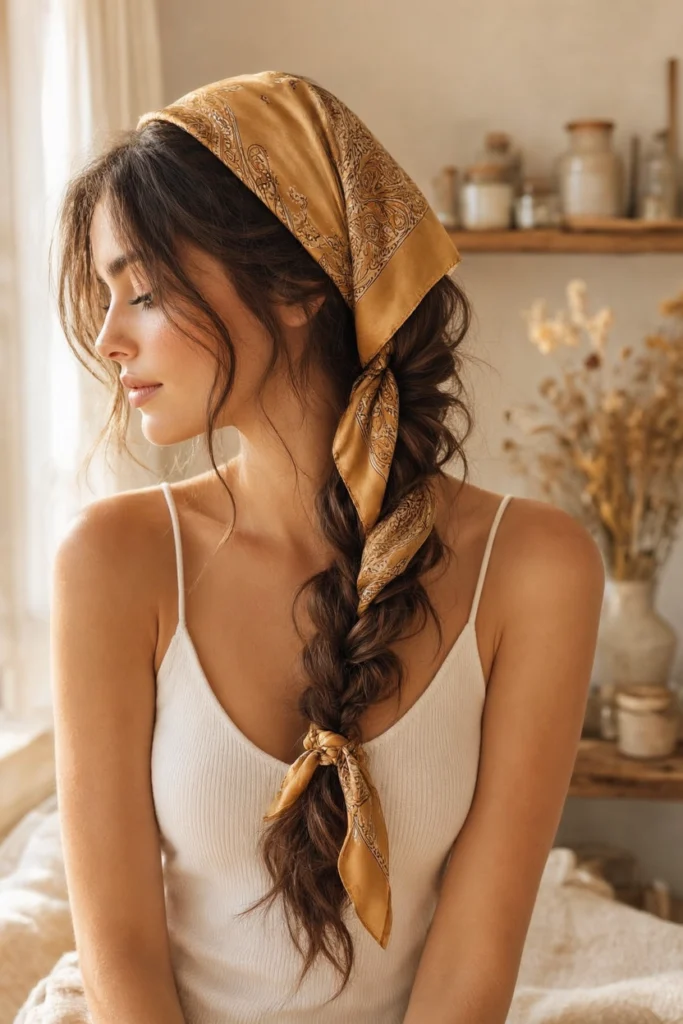
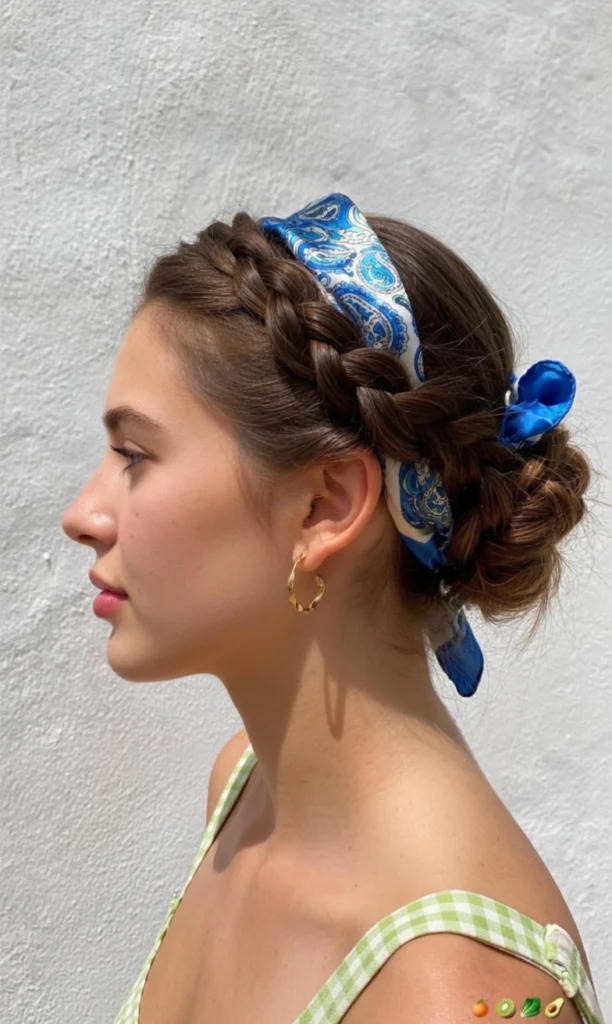
5. Double Braid with Bandana Accent
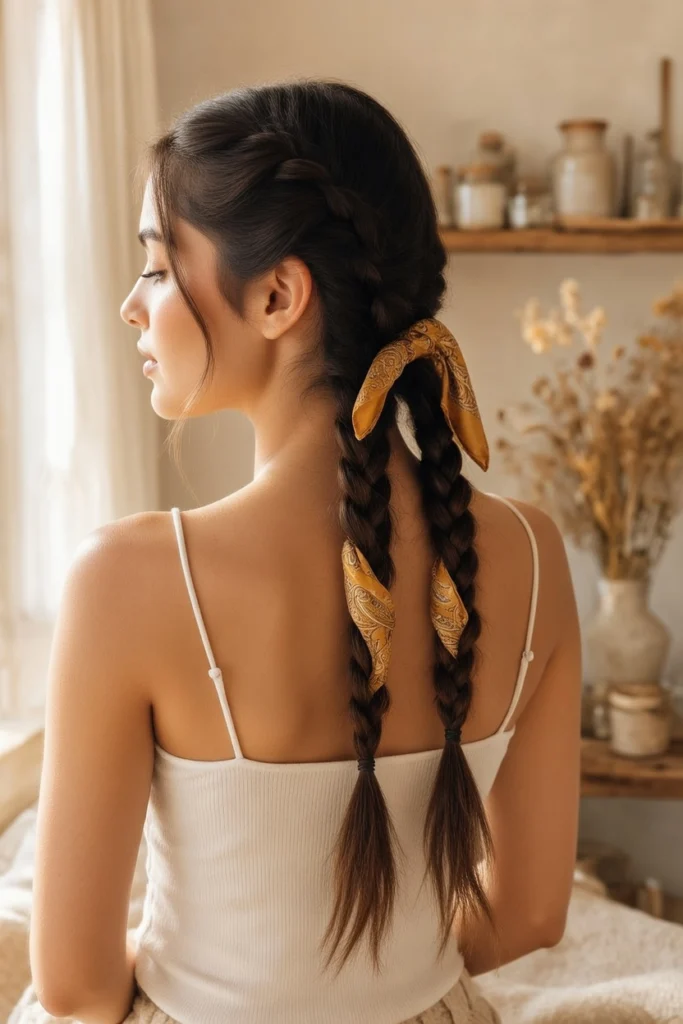
Tie your scarf around your head first, then do two simple braids on either side. The scarf peeks through between the braids. This one looks more complicated than it is I figured it out by accident while trying to keep hair off my neck during a heatwave.
6. The Pirate Wrap (Full Coverage)
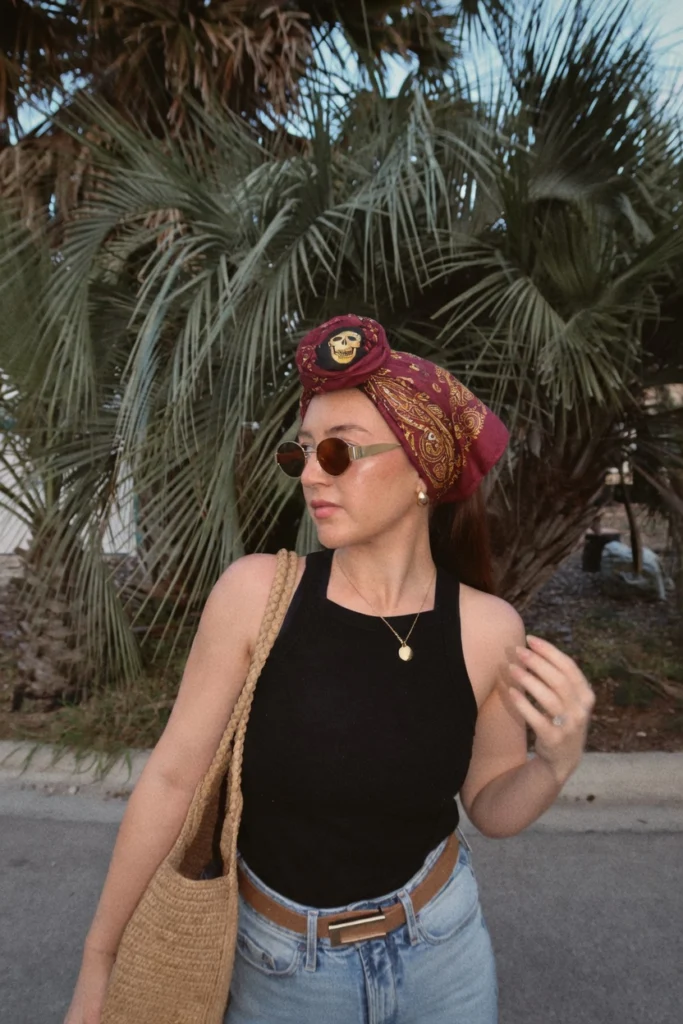
Cover your entire hairline and tie at the back, tucking loose ends in. Great for bad hair days, dusty environments (I do this when cleaning my apartment), or just when you want zero hair in your face.
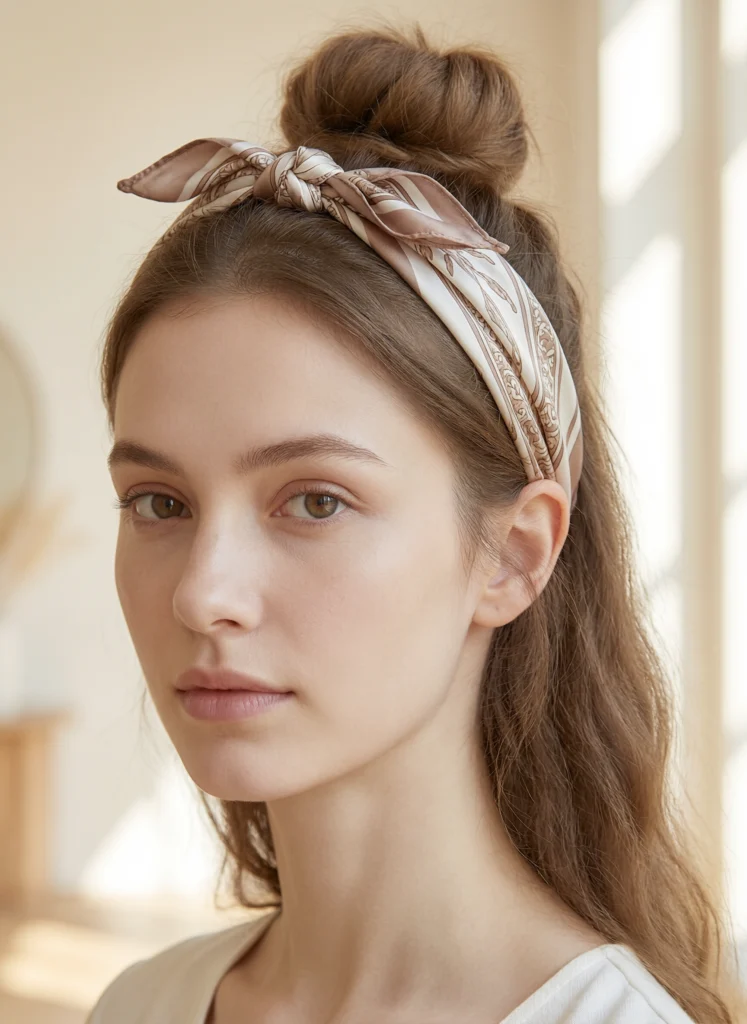
7. Top Knot with Bandana Base
Wrap the bandana around your head first, then pile your hair into a high bun on top. The fabric peeking out underneath the bun adds a cute pop of color or pattern.
8. Side-Tied Bandana

Instead of tying at the back, tie the knot off to one side near your ear. This small change makes the whole look feel more casual and asymmetric perfect for weekend errands.
9. Bandana Over Slicked-Back Hair
Slick your hair back with a bit of gel (I use Cantu’s edge control), then tie the bandana as a thin headband. Gives off that clean, model off duty vibe.
10. Twisted Crown Wrap
Fold the scarf into a long strip, twist it once or twice, then wrap it around your head like a crown and tuck the ends. This works really well if your scarf has a fun pattern since the twist shows off more of the design.
11. Bandana Bow on Ponytail
Same as the low ponytail wrap, but tie it into a big floppy bow instead of a knot. Feels very “main character energy” my younger cousin actually taught me this one from a TikTok trend.
12. Layered Double Bandana
Use two different coloured scarves one as a base wrap, one tied loosely on top at an angle. Sounds like a lot, but it’s actually a great way to use up smaller scarf scraps that are too tiny for one style alone.
13. Bandana with Loose Waves
If you’ve curled your hair, tie a thin bandana strip just along the hairline. The contrast between sleek fabric and soft waves looks expensive without being expensive.
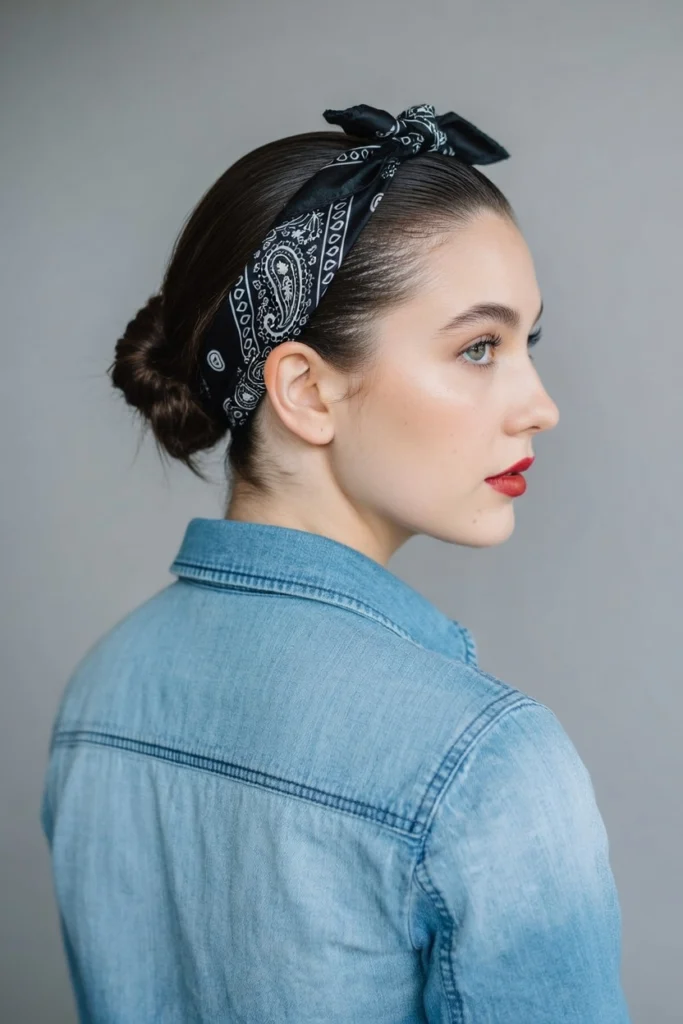
14. Hidden Knot Under Hair
Tie the bandana, then pull a small section of hair over the knot to hide it completely. Looks like the scarf is magically holding your hair in place with no visible tie.
15. Bandana as a Hair Tie Alternative

Instead of tying around your head, use a thin strip of silk to tie off a ponytail or braid directly like a fabric hair tie. Gentler on hair than elastic bands, especially if you’ve got fine or breakage prone hair like I do.
Step-by-Step: My Go-To Everyday Wrap (Style #1, The Classic)
Since this is the one I do almost daily, here’s exactly how I do it:
- Start with slightly damp or dry hair doesn’t matter much
- Fold your silk square into a triangle
- Roll the long edge toward the point, creating a long band (don’t roll all the way leave a bit of width)
- Place the band along your hairline, starting from the center of your forehead
- Cross the ends behind your head
- Tie in a knot or bow, either at the nape or on top
- Adjust so it sits about an inch back from your hairline too far forward looks like a headband from a costume
Takes me under a minute now, but my first few attempts took closer to ten.
Mistakes I Made So You Don’t Have To
Mistake #1: Tying it too tight. Your scalp will thank you for leaving a little breathing room. Tight wraps = tension headaches and sometimes even mild hair breakage at the hairline.
Mistake #2: Using satin instead of silk and calling it the same thing. They look similar but satin is usually more slippery and synthetic it slides off way more easily. Real silk has a bit of grip.
Mistake #3: Wearing the same wrap for too long. If you sweat in it (gym, hot weather), the silk can transfer oils back onto your scalp. I learned this after a particularly sweaty summer walk not my best smelling moment.
Mistake #4: Ironing your silk scarves. Direct heat can damage real silk fibers. Steam works way better if you need to de-wrinkle one.
Real-Life Scenarios Where These Actually Helped Me
- Job interview day: Used the low ponytail wrap (#4) when my hair wouldn’t cooperate. Looked polished, felt confident.
- Beach vacation: The pirate wrap (#6) kept sand and wind out of my face for an entire day at the shore.
- Video call emergency: Half-up bandana bun (#2) saved me when my camera turned on unexpectedly during a work call and my hair was… not camera-ready.
- Random Tuesday: Honestly, most days it’s just style #1 because it’s fast and works with literally any outfit.
If you want more visual inspiration for these styles, I’ve actually pinned a bunch of my favourite looks and tutorials on my Pinterest board check it out here for ideas I haven’t even gotten around to writing about yet.
Final Thoughts
What I love most about silk bandana hairstyles is that they’re forgiving. You don’t need salon perfect hair underneath actually, slightly messy hair often looks better because it adds texture and volume under the scarf.
Start with one or two scarves, try a couple of these styles on a lazy weekend when you’re not rushing anywhere, and figure out what feels natural for your hair length and texture. Some of these will click instantly, others might take a few tries (looking at you, twisted crown wrap took me four attempts before it looked right).
And hey, if your first attempt looks a little wonky? That’s basically a rite of passage. Mine did too.